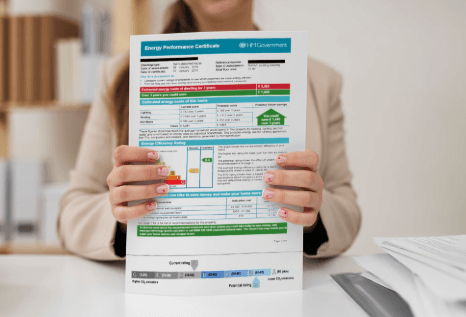
If you’re building, extending or renovating, an energy rating certificate will eventually land in your inbox. It’s usually a multi-page document full of numbers, codes and technical terms, and most people file it away without reading it.
That’s a missed opportunity. The certificate is more than a permit requirement. It’s a snapshot of how your home is expected to perform: how comfortable it will be, how hard your heating and cooling will work, and which design choices are helping or hurting.
Here’s how to make sense of it.
What the certificate actually is
An energy rating certificate is produced by an accredited assessor who models your home’s design using NatHERS (the Nationwide House Energy Rating Scheme) software. The assessor uses your plans to estimate how much heating and cooling the home would need to stay comfortable across a year, then converts that into a star rating from 0 to 10.
A higher rating means the home should need less artificial heating and cooling. A 10-star home would need none. A 0-star home does almost nothing to moderate the temperature inside.
Many projects are assessed against a 6 star energy rating as a widely recognised benchmark, so it’s a useful reference point when you read your results. Requirements can differ depending on your state, the type of building and when your permit is lodged, so always confirm the target with your assessor or building surveyor.
The key sections, explained
1. The star rating
This is the headline figure, usually shown prominently at the top. It’s the overall result of the assessment, sometimes with a decimal (for example, 6.3 stars).
Two things worth knowing:
- It relates to the design, not how you live. The rating assumes standard household behaviour, so your actual bills will vary depending on your habits, appliances and the weather.
- Every fraction counts. A home that only just scrapes over the required rating has less room for change than one comfortably above it. If you alter the design later, a small tweak can push you under.
2. Heating and cooling loads
Alongside the star rating, you’ll usually see figures for heating and cooling, typically in megajoules per square metre per year (MJ/m²). This is the estimated energy needed to keep the home comfortable.
Look at how the two numbers compare:
- A high heating load suggests the home may struggle to stay warm in winter. Common causes include too little insulation, large south-facing windows or poor sun access.
- A high cooling load suggests summer overheating. Causes include unshaded west-facing glass, dark roofing and poor ventilation.
Lower numbers are better, and the balance tells you which season your design finds harder.
3. Climate zone
Your certificate lists the climate zone your home was assessed in. This matters because the same house performs very differently in Melbourne, Perth or Cairns. A design that earns a strong rating in one zone may fall short in another, so make sure the zone matches your actual location.
4. Dwelling details
Check the basics on the first page:
- Address and lot details
- Floor area and number of bedrooms
- Orientation (which direction the front of the house faces)
- Certificate number and date
Errors here can throw off the whole assessment. If the orientation is wrong by 90 degrees, for example, the result could be quite misleading.
5. Construction specifications
This section lists what the assessor assumed about your walls, roof, floors and ceilings. Look for:
- Wall construction and insulation levels (usually shown as R-values, where higher means better insulation)
- Roof and ceiling insulation
- Floor type and coverings (tiles, carpet, timber)
- Wall and roof colours
This is one of the most important parts of the certificate. The rating only holds if the home is built to match these specifications. If your builder substitutes cheaper insulation or a different floor finish, the certified rating may no longer apply.
6. Windows and glazing
The window schedule details each window’s size, location, frame type and glass performance. You’ll often see two technical terms:
- U-value measures how easily heat passes through the glass. Lower is better.
- SHGC (Solar Heat Gain Coefficient) measures how much solar heat gets through. The right value depends on the window’s orientation: more gain can help on north-facing windows in winter, but it’s a problem on west-facing glass in summer.
Windows often have an outsized effect on a home’s rating, which is why changing them late in the process can cause problems.
7. Shading, fans and other features
Look for notes on eaves, awnings, external shading, ceiling fans, sealed vents and exhaust fans. Small features like these can influence the result more than people expect. Ceiling fans, for example, can reduce the reliance on air conditioning by making rooms feel cooler.
8. Assessor and software details
The certificate should show who prepared it, their accreditation details and the software version used. Certificates usually include a unique certificate number and often a QR code that lets you check the details are genuine.
See also: Best Business Setup Company in Dubai: How to Choose the Right Business Partner
Questions to ask yourself when you read it
- Does the rating meet the requirement for my project? Confirm with your surveyor or assessor.
- Do the specifications match what my builder has quoted? Compare insulation, glazing and floor coverings line by line.
- Do the orientation and address match my plans?
- Which is higher: heating or cooling? That shows where the design is weakest.
- Is there any margin, or is the result borderline? A borderline result leaves little room for changes.
What to do if something doesn’t look right
- Ask your assessor to explain any figure or assumption you don’t understand.
- Flag design changes early. If plans change, the certificate may need to be updated and reissued.
- Keep a copy with your permit documents and pass it to your builder, and make sure your builder has seen the specifications.
- Consider cost-effective improvements. Upgraded glazing, extra insulation or better shading can lift a borderline rating and improve comfort as well.
The bottom line
An energy rating certificate can look intimidating, but the essentials are simple: the star rating, the heating and cooling loads, and the list of specifications your home must be built to. Read it carefully, check it against your plans and builder’s quote, and ask questions while changes are still cheap.
Understanding your certificate helps you build a home that is more comfortable and cheaper to run, and it can also save you from expensive surprises later.